Making your First Call to the UserVoice API
Configure the Client
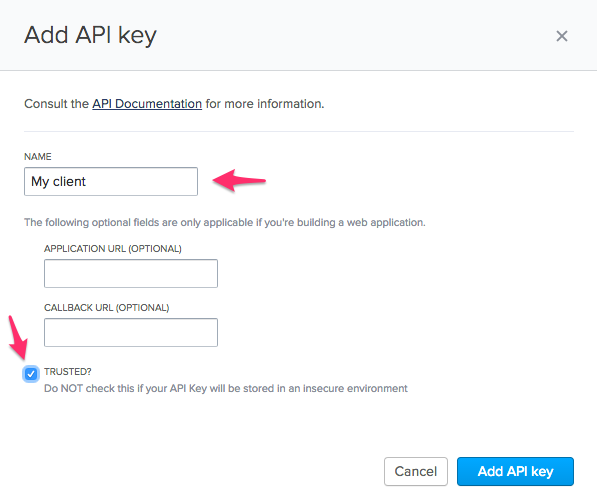
To connect to the UserVoice API, start by creating a trusted API client. Do this in your UserVoice Admin Console by navigating to Settings → Integrations → UserVoice API keys. Click the button that says “Add API Key…” and enter a name for for the client. Use a name that will help you keep track of where the token will be used (e.g Zapier Integration, or Nightly Export to BI). Leave the “APPLICATION URL” and “CALLBACK URL” text fields blank, and make sure the “Trusted” checkbox is checked. Then click the button labelled “Add API key” to create the client.
Best Practices: You can create multiple clients for specific purposes through this user interface. It’s a good idea to use a separate key for each kind of interaction that you want to build with the API. By doing so, you safely revoke keys as your needs evolve.
Warning: Never store trusted client credentials in an insecure environment (for example: in your client-side JavaScript or a public source code repository). Trusted clients have full access to perform the same actions that admins do, including deleting content.
Remember: The UserVoice API requires all calls to be made over HTTPs.
Getting the Token
To make an API call, you’ll next need to generate a token. There are two ways to do this, either through the user interface or by using the API itself.
To generate and display the token in the user interface, find your client by name in the list and click the “Create” link.
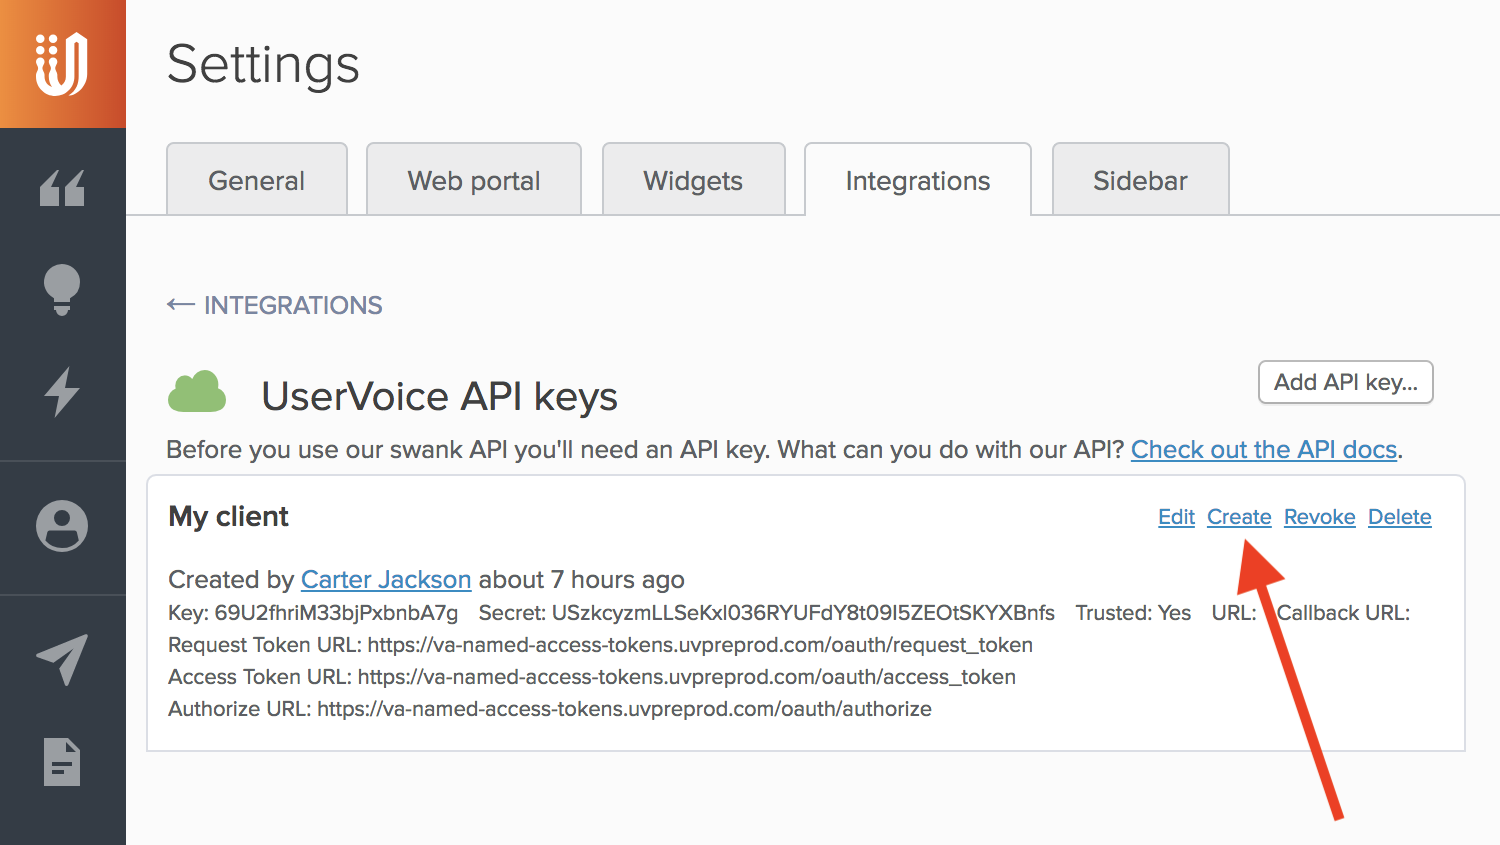
A dialog will appear with your token.

You can alternatively request a token for your UserVoice account owner with the API key and secret. Here’s how it would be done with curl:
1 2 | |
Example response:
1
| |
For clients where the API secret and not be safely secured, please see OAuth Authorization Code Flow with PKCE.
Making your First Call
Once you’ve used either of the methods to obtain a token, you can authenticate your API requests by passing your access_token in the Authorization header. Here’s an example call done with curl:
1 2 | |
All requests to the API will need to use this Authorization header for access. Remember not to place this token in a publicly visible context.
If the token expires or is invalidated, the API will return a 401 Unauthorized error with a body that looks like this:
1
| |
At this point, your application should request a new access_token via the API and retry the request with the new token.
Tokens generated through the User Interface in the admin section will not expire unless they are explicitly revoked through the user interface.